Showing posts with label cookies/bars. Show all posts

Monday, December 19, 2016

Turtle Thumbprint Cookies


Hello there Christmas baking season!  It just makes my heart happy to make treats for the holidays :)  This month I decided to make treats for my husband's work every week for the month.  This way, I can get my baking fix in and yet not eat an obscene amount of goodies.  I can try one or two and then send the rest on their way.  Win-win.  

These little delicious morsels were perfect!  A little more time consuming than some other cookie varieties, but a little more time is worth. every. bite.  Enjoy! 

Turtle Thumbprint Cookies
Yield: 20 small cookies

For the cookies:
1 cup all purpose flour
1/3 cup cocoa powder
1/4 tsp salt
½ cup (1 stick) butter
2/3 cup sugar
1 large egg, separated
2 Tbsp milk
1 tsp vanilla
1 cup pecans, finely chopped

For the Caramel:
2/3 cup Kraft caramel bits (or regular caramels, melted)
1/2 tsp water

Combine flour, cocoa and salt. In a separate bowl cream together the butter and sugar until light and fluffy. Mix in the egg yolk, milk and vanilla.  Stir in flour mixture, just until combined. Chill dough in the refrigerator for one hour.
Whisk egg whites in a bowl until frothy.  Place chopped pecans in another shallow bowl. Remove dough from fridge and roll into small balls (however many cookies you want--I made 20 small ones).

Roll each dough ball in the frothy egg whites, and then roll and press in the chopped pecans. Place on a greased baking sheet.  

Use the back of a small measuring spoon to make an indentation in the center of each dough ball.

Bake at 350 Degrees F for about 10-12 minutes, or until set.

As the cookies come out of the oven, gently re-press the indentations with a small spoon.
 
In a microwavable bowl mix the caramel bits and water. Microwave at 30-second intervals, stirring after each interval, until caramel is melted (1-2 minutes). Pour small spoonfuls of caramel into the indented cookies.  *Optional: Drizzle with melted chocolate (or sprinkle with sea salt)!

Recipe Source:  Tastes Better From Scratch

Wednesday, May 18, 2016

21-Day Fix No Bake Cookies


21 Day Fix Round One Summary

Well, finished 21 days, and overall I think I am doing ok.  My total tally after 21 days is 7 pounds, 3.8% of my body weight.  I know I could have lost more, but lets just say I wasn't super strict to the eating plan...I went more by the 80/20 rule.  By the 80/20 rule I mean I stuck to my diet plan 80 percent of the time, which is pretty good.  I still saw results, even with going up a calorie level with the breastfeeding.    My biggest struggle....pop.  I love it.  I drink Diet, and I know that really isn't much better so I am trying to wean myself down to once a week like my hubby is doing.  I'm just not there yet.  The containers really aren't hard to follow, and I never feel STARVING, but I have had a few days the breastfeeding munchies have gotten the best of me.  

The exercises have made me stronger.  I can see more definition, and in the photos I took of myself I can see a big difference in the size of my belly especially.  As I continue the diet up, I plan on mixing up my exercises with the 21-Day Fix and T-25.  I am not quite ready for Insanity yet...maybe after this next round.  


Moving on...these cookies are great!  I dare say that I like these better than their butter-loaded counterparts!  I definitely got my chocolate fix from these and was able to enjoy a few out of the fridge the whole next week.  They are super easy...a 10-minute dessert that my whole family enjoyed.  Win-win!

21-Day Fix No Bake Cookies

1 cup natural peanut butter
3/4 cup honey
1/2 cup coconut oil
2 tsp vanilla
2 1/4 cup oatmeal
6 Tbsp cocoa powder

Melt peanut butter, honey and coconut oil in a sauce pan over medium heat.  Stir.  Once melted remove from heat and add vanilla, cocoa powder, and oatmeal.

Stir and drop by spoonfuls on parchment paper.  Place in fridge to harden.  Enjoy!  Place extra cookies back in the fridge for later.

I usually can make between 24-30 cookies with this recipe, depending on the size.

21 day fix container:  1 yellow treat swap

Recipe Source:  Pearls and Pushups

Wednesday, May 4, 2016

Chocolate Chip Toffee Cookies

 It maybe hard to believe considering this post, but my 21-Day Fix is going well.  I have really liked it, and even with a few cheat moments (like 2 of these cookies and the occasional pop), I am down 5 pounds in 9 days.  My husband is down about 6 pounds...not quite on the same diet, but since I am eating healthier, so is he.  I was hoping for more energy, but with a newborn that's not going to come no matter what.  The key with it so far is that I went up a calorie bracket since I am nursing and ALWAYS hungry. I haven't felt starving yet and my milk supply seems to be fine.

Anyhow, these cookies.  Our church group was asked to donate cookies to the Hospice House here in town every week this month.  And this just happened to be the last month they are able to except homemade ones before the health department starts making them go to strictly store bought ones.  So, even though I am on this diet, I made cookies.  In fact, I doubled the recipe and froze a bunch so my kids don't have to be deprived while I am going through my weight loss journey.  I of course at least had to taste these, and I must say I was impressed :)  I am really looking forward to the weekend and my cheat meal that I can have another out of the freezer!

With this diet, there haven't been a whole lot of recipes I have been using, just throwing a bunch of stuff together.  I have started keeping track this week of meal ideas and will share those that really don't have  a recipe later this month :)


Chocolate Chip Toffee Cookies

3/4 cup (1.5 sticks) unsalted butter, softened
3/4 cup brown sugar
1/2 cup granulated sugar
1 egg
2 tsp. vanilla extract
2 cups all-purpose flour
2 tsp. cornstarch
1 tsp. baking soda
½ tsp. salt
1 cup semisweet or dark chocolate chips
1 cup toffee chips

Preheat oven to 350 F.

Using an electric mixer with the paddle attachment, cream together butter and sugars on medium speed until light and fluffy, about 2 minutes. Add egg and vanilla and beat in until combined, scraping down the bowl partway through.

In a separate bowl, whisk together flour, cornstarch, baking soda and salt until evenly mixed. Add mixture into the dough, and beat on low speed until combined. Fold in chocolate chips and toffee chips, and stir until just combined.

Measure dough into rounded tablespoon-fulls, and roll into round balls. Place on a parchment-covered baking sheet, and dot with extra chocolate and toffee chips if desired. Repeat with remaining dough. Then transfer the cookie sheet to the freezer and chill for 5-10 minutes.

Transfer sheet to oven and bake for 8-10 minutes, until the tops of the cookies ever so slightly begin to brown. Remove pan and let rest for 5 minutes. Then transfer cookies to a wire rack to finish cooling. Repeat with remaining dough.

Store cookies in an airtight container for up to 5 days.

 Recipe Source:  Gimme Some Oven

Friday, December 4, 2015

Double Chocolate Mint Cookies


 Do you ever just trust a person when they share a recipe?!  There are a few bloggers/friends if they say something is good I trust them whole-heartedly!  This recipe comes from one of those bloggers and I was not disappointed :)  These cookies turned out soft and delicious.  My family loved them minus my child that hates anything that contains mint.  

I had a bag of the regular Andes mint chips to use from the baking aisle, but the Andes peppermint pieces would be AMAZING, too I'm sure :)

Double Chocolate Mint Cookies

1 cup (8 ounces) butter, cool room temperature (not warm or overly soft!)
3/4 cup (5.5 ounces) lightly packed brown sugar
1/2 cup (3.75 ounces) granulated sugar
2 large eggs (3.5 ounces)
1 teaspoon vanilla extract
2 cups (10 ounces) all-purpose flour
1/2 cup (2 ounces) natural, unsweetened cocoa powder
1/4 teaspoon salt
1 teaspoon baking powder
1/2 teaspoon baking soda
1 cup (6 ounces) semisweet chocolate chips
1/2 cup (3 ounces) crushed or finely chopped regular or peppermint Andes mints (In baking aisle or holiday section)
Additional 1/2 cup or so crushed or finely chopped Andes mints for rolling

Preheat the oven to 350 degrees F. Line two large, rimmed baking sheets with parchment paper or silpat liners.

In the bowl of an electric stand mixer (or in a large bowl with an electric hand mixer), cream the butter, brown sugar and white sugar together until well-mixed, 2-3 minutes.

Add the eggs and vanilla extract and mix.

In a separate bowl, whisk together the flour, cocoa, salt, baking powder, and baking soda.

Add the dry ingredients to the batter and mix until just combined (it's ok if there are a few dry streaks). Mix in the chocolate chips and 1/2 cup crushed Andes mints until combined and no dry streaks remain.

Scoop the dough and shape into heaping tablespoon-sized balls (I use a #40 cookie scoop) and gently roll the tops into the additional crushed mints, pressing lightly into the plate or bowl of crushed mints so they stick to the top of the cookie dough ball.

Place a couple inches apart on the prepared baking sheets and bake for 10-11 minutes (watch closely and don't overbake; the edges will be set with soft middles).

Let the cookies cool for a few minutes on the baking sheet and then remove to a cooling rack to cool completely.

Recipe Source:  Mels Kitchen Cafe

Monday, November 9, 2015

Fruity Pebble Cookies

 I am always excited to try new cookie recipes.  My almost two-year-old LOVES to "help Mom" more than my other kids ever did.  Recipes like this make it super easy for him to help me without stressing me out to the max.  We both had a fun time making these and they tasted yummy to boot!

Fruity Pebble Cookies

1 box Funfetti Cake mix (I actually had a rainbow chip mix with pudding, so I used that)
2 eggs
⅓ cup oil
1 cup Fruity Pebble Cereal

Preheat oven 350.  Mix all ingredients together gently until combined.  I oil my hands and roll the dough in balls and place on cookie sheet.  Bake about 8-10 minutes.
See it doesn't get any easier!!

Recipe Source:  Life With the Crust Cut Off

Monday, June 8, 2015

Chocolate Chip Cherry Bars

Cherry season has begun here in Washington!  Yipee!  We love our Washington cherries.  Nate's co-worker does some picking on the side for extra money and brought us our first batch of cherries from a local orchard.  So...I thought it was time to try some new recipes!  Here's my first cherry recipe of the season for you, and it is so good!

Chocolate Chip Cherry Bars 


1/2 cup unsalted butter, melted (1 stick)
1 cup light brown sugar, packed
1 large egg
2 teaspoons vanilla extract
1 cup all-purpose flour
1/4 teaspoon salt, optional
3/4 to 1 cup semi-sweet chocolate chips
1 cup cherries (or combination of raspberries, blueberries, strawberries, blackberries; fresh or frozen)

Preheat oven to 350F. Line an 8-by-8-inch pan with aluminum foil, spray with cooking spray; set aside.

In a medium microwave-safe bowl, melt the butter, about 60 seconds.  To the melted butter, add the brown sugar and stir to combine.

Add the egg, vanilla, and stir to combine. Add the flour, salt, and stir until just combined, taking care not to over mix or the blondies will be tough.

Fold in chocolate chips, fruit (I don't halve the cherries: I like them chunky and big), and pour batter into prepared pan, smoothing it lightly with a spatula or offset knife if necessary.

Bake for 27 to 32 minutes, or until edges begin to slightly pull away from sides of pan and center is set. Baking time will vary based on types of fruit used, fresh, frozen, and the moisture content of the fruit; and how gooey you like your blondies. A toothpick inserted into the middle may not come out clean due to the chocolate chips or juicy fruit. Allow bars to cool for at least 1 hour before slicing and serving. Blondies can be stored in an airtight container at room temperature or in the refrigerator for up to 1 week or frozen for up to 3 months.

Recipe Source:  Averie Cooks

Wednesday, June 3, 2015

Little Lemonies (Lemon Brownies)

Despite all my sweet posts lately, I am actually losing weight!  I had braces put on 2 weeks ago, and eating has been a challenge, so I'll just call it the bonus to having braces!  I have had to figure out which foods are too hard to eat with braces and avoid them (which is hard...I LOVE raw almonds, but they are just no bueno).  

I love all the citrus recipes that pop up this time of year.  I had a baby shower for a good friend this week and this was my contribution to the dessert table.  These are perfectly moist, no too lemony, and definitely crave-able!  Enjoy :)
Little Lemonies

 Lemon Batter:
1 cup (5 ounces/142 grams) all-purpose flour
3/4 cup (5.5 ounces/155 grams) sugar
1/4 teaspoon salt
1/4 teaspoon baking powder
1 tablespoon lemon zest (from 1 large lemon)
1 stick (8 tablespoons) butter, melted and cooled
2 large eggs
1 large egg yolk
3 tablespoons fresh lemon juice
1 teaspoon vanilla extract

Lemon Glaze:
3/4 cup (2.75 ounces/75 grams) powdered sugar
1 tablespoon fresh lemon juice
1/2 teaspoon lemon zest

Preheat the oven to 350 degrees F. Line an 8X8-inch aluminum baking pan with parchment so that it hangs over two of the edges (to lift out the bars later - alternately, you can just grease the pan really well and slice them in the pan) and lightly coat the pan and parchment with nonstick cooking spray.
In a large bowl, whisk together the flour, sugar, salt, baking powder and lemon zest.
In a separate bowl or in a large liquid measuring cup, whisk together the butter, eggs and egg yolk, lemon juice and vanilla.

Stir the wet ingredients into the flour mixture and mix until combined.

Spread the batter evenly in the prepared pan.  Bake for 18-20 minutes until a toothpick inserted in the center comes out clean or with moist crumbs (the top of the bars should spring back lightly when gently pressed). Don't over bake or they might be dry.

For the glaze, whisk together the powdered sugar, lemon juice and lemon zest until smooth and combined.
After the bars have cooled completely in the pan, drizzle the glaze over the top (since the glaze layer is thin, it helps to pour it all across the bars instead of in one puddle before spreading) and use an offset spatula or knife to spread evenly over the bars.

Place the bars in the refrigerator for 1-2 hours to let the glaze set before lifting them from the pan (using the parchment overhang) and cutting into small squares. These taste best chilled, in my opinion, but can be served at room temperature also.


Recipe Source:  Mel's Kitchen Cafe


Looking for more lemony goodness?  Try clicking here for a few of my favs :)

Tuesday, May 12, 2015

Chocolate Peanut Butter Swig Style Cookies


 Sometimes I just really really wish we lived in Utah with our family and friends.  We don't...probably never will again.  I am going to be ok with that someday (we've been away for 7 years)!  We have missed out on a lot of growth in the area I grew up the last 7 years.  When we go back to visit, we always hit up our favorite spots and rarely try new things.  

This Swig sensation that is sweeping across Utah is one thing we've missed out on, and so I decided to try a few copycat recipes so I don't feel like I'm missing out :)  I tried the original Swig copycat recipe a few months ago ( see here for that recipe). This version turned out delicious, just like that one, and it being my hubby's favorite combo of chocolate and peanut butter, this one definitely is #1 is his book :)

Chocolate Peanut Butter Swig Style Cookies


For Chocolate Cookie Dough:
½ cup butter, room temperature
½ cup shortening, (butter flavor is best)
1½ cups sugar
1 cup sour cream
½ teaspoon almond flavoring
1 teaspoon vanilla extract
¾ cup plus 2 tablespoons unsweetened cocoa
3½ cups flour
1 teaspoon baking powder
1 teaspoon salt

For shaping cookies:
¼ cup granulated sugar
cooking spray
*glass with flat bottom, see notes below

For Peanut Butter Buttercream Frosting:
½ cup butter, room temperature
½ cup peanut butter
1 teaspoon vanilla
½ teaspoon salt
¼ cup full fat sour cream
3-4 cups powdered sugar (or more to desired consistency)


Preheat oven to 350 or 325 on convection setting.

Cream butter, shortening and sugar together.  Add sour cream and almond flavoring. Mix. Add the cocoa and mix again until smooth. The mixture should be creamy, with no specks of white. Turn the mixer off.  Add the flour, baking powder and salt all at once. Mix just until all of the flour disappears, on the lowest setting. This should take about 20-30 seconds.

Using a 1¾ inch to 2 inch scoop, place the dough onto a lightly greased cookie sheet.
Lightly spray the bottom of a glass with cooking spray. First press the glass against a cookie, then dip the bottom of glass in sugar to flatten cookie a bit. Continue dipping the bottom of the glass into the sugar after flattening each cookie.

After all of the cookies are flattened a bit, go back and lightly sprinkle sugar on top of each cookie.  Bake for about 9-10 minutes at 325 convection, or about 10-12 minutes at 350.  The cookies should be barely firm on top. Do not over cook!  Let cool completely on cookie sheet. Frost when cool.

Yield about 18 large cookies or 30-32 small to medium cookies.

For Peanut Butter Buttercream Frosting:

Cream butter until it lightens in color.  Add peanut butter, vanilla extract, salt and sour cream. Whip until very smooth 2-3 minutes.  Add powdered sugar one cup at a time, then mix on high until very smooth. Continue adding powdered sugar to the desired thickness. If you add too much powdered sugar add a little more sour cream to balance it out.


Recipe Source: Fresh and Happy

Thursday, March 5, 2015

Copycat Swig Sugar Cookies


I haven't lived in Utah for almost 7 years.  That's weird.  I have missed out on so much growth taking off down there.  My hometown has just boomed since I moved away...all sorts of new yummy restaurants, things to do, much better shopping, etc.  Makes me want to go back all the time.  One of the places that has been popping up are drink stops, where you can apparently get some "dirty Diet Cokes" (Diet Coke with some coconut syrup) or whatever you desire.  These places have delicious cookies as well (or so I've heard).  I was tired of hearing about how fantastic these copycat cookies are from a drink-stop called Swig, so I made up my own batch.  Oh man are they good (I managed to limit myself to one and sent the rest with the hubs to work)!  Since trying this recipe I have since pinned 3 or 4 more variations to this cookie that I am so excited to try :)  

Copycat Swig Sugar Cookies


1 C Butter (room temperature)
3/4 C Vegetable Oil
1 1/4 C Sugar
3/4 C Powdered Sugar
2 T Water
2 Eggs
1/2 t Baking Soda
1/2 t Cream of Tarter
1 t Salt
5 1/2 C Flour

Cream together Butter, Vegetable Oil, Sugars, Water, and Eggs.  Combine dry ingredients and slowly add to butter mixture.  Mix until everything is combined.  Your dough should be a little crumbly and not sticky at all.  Roll a golf ball sized ball of dough and place it on your cookie sheet.

Put 1/4 c of sugar and a pinch of salt in a dish (this is in addition to the sugar and salt listed above.)  Stick the bottom of a glass in it.  This is going to be your cookie press.  Firmly press it into the center of your dough ball.  You want your dough to spill out over the sides of the glass.  If there is a lip its even better.  Bake at 350 for 8 minutes.  They should just barely be browning on the bottom.    Move cookies to a cooling rack.  Once they are cool put them in the fridge.  


Sour Cream Frosting

1/2 cup room temperature butter
3/4 C Sour Cream
Approx 1 2lb Package of Powdered Sugar (I never use the whole thing but love having extra on hand just incase I add to much milk!)
1 t salt
1/4 C Milk
Red Food Coloring

Start by creaming together butter and sour cream and salt.  Slowly add powdered sugar.  When it gets so thick its not frosting like add a splash of milk.  Alternate this process until your frosting is the desired consistency.  Add 1 drop of red food coloring and whip on high for 1 minute.

Keep cookies in a sealed container until they are ready to serve.  The magic of a Swig Sugar Cookie is that the cookies are cold and the frosting is room temperature.  Frost right before serving (if you make them in advance and need to refrigerate the frosting make sure you give it time to warm up before serving)


Recipe Source:  Vintage Revivals

Monday, February 9, 2015

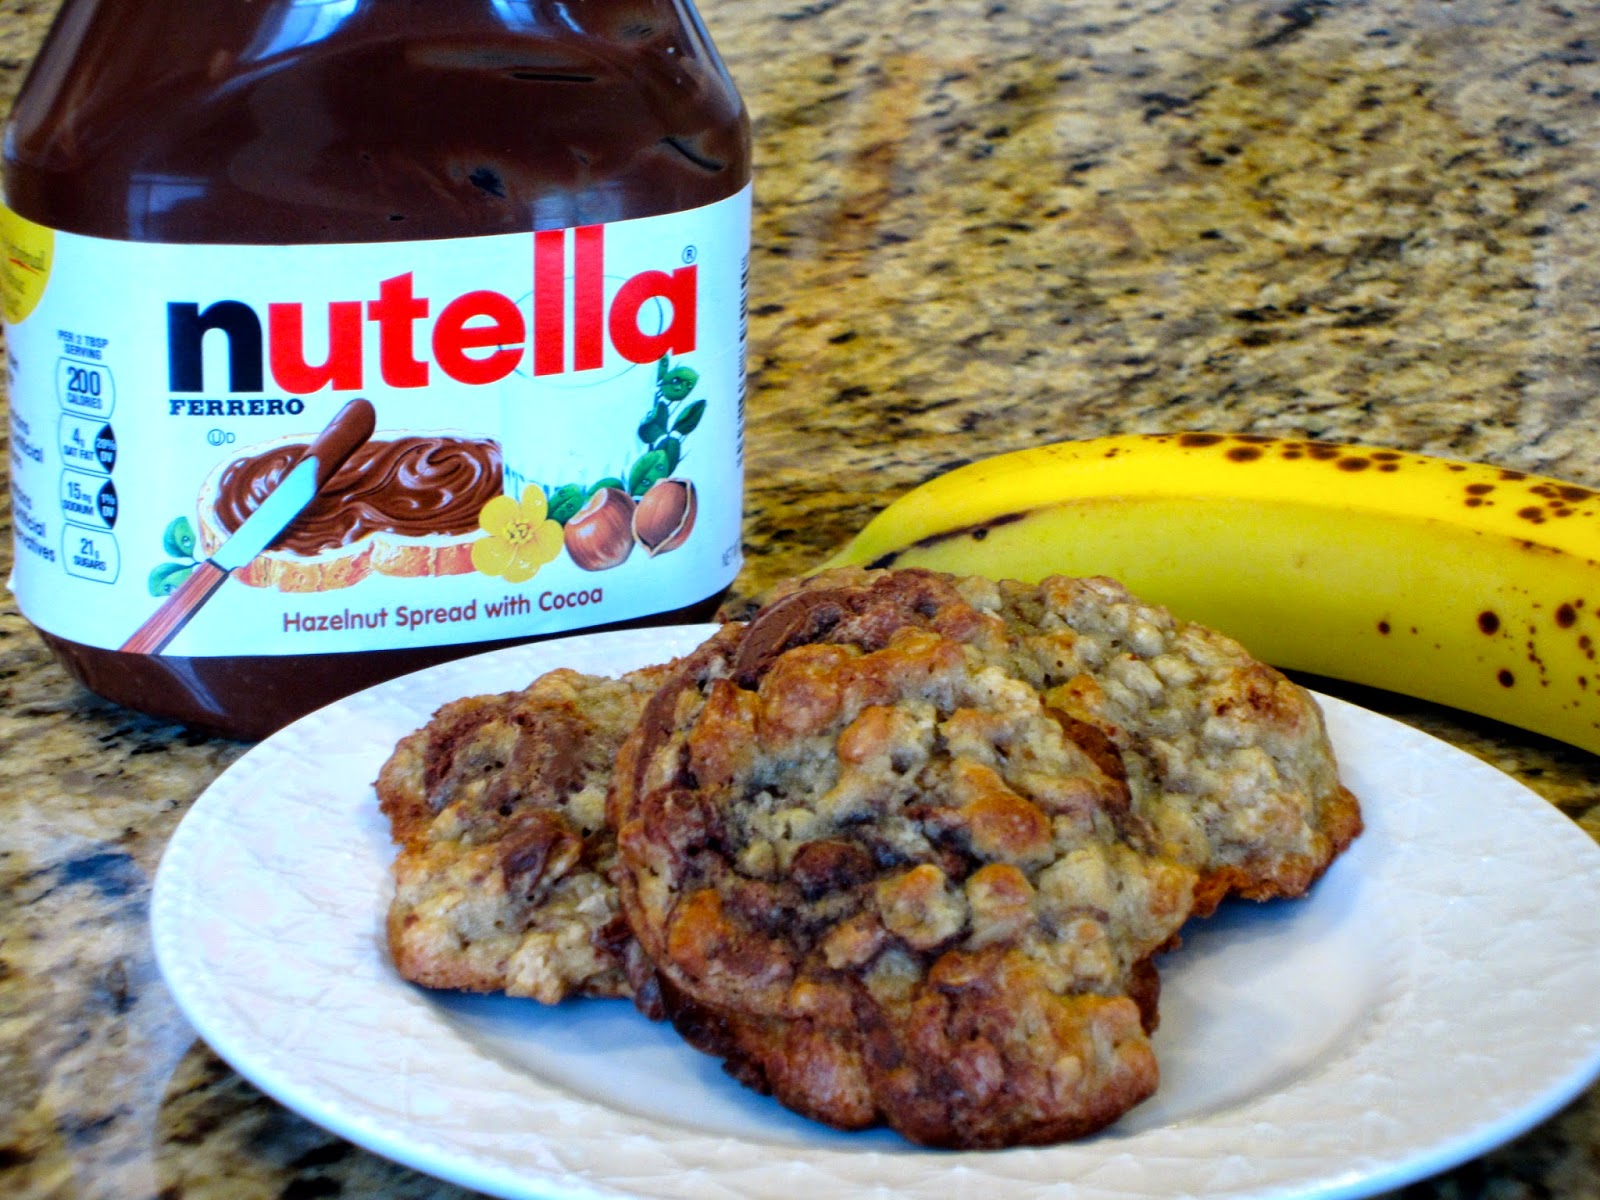
Nutella Banana Cookies


Well, we've been eating lots of veggies over here and limiting our sugar intake.  I am feeling stronger and more energetic the last few weeks.   On top of that, I have finally found a workout that is working well for me (outside of the gym of course).  Beachbody's T25 is such a great workout for the time.  I love Insanity, but it does a number on my knees.  I could never follow it fully, having to take days off.  This one is totally doable, and I feel it working already.  

Anyhow....I'm talking about healthy stuff and then have these cookies thrown in your face.  We had a few friends over recently and my hubby promised them dessert, so I made up a yummy lite trifle and these cookies for the kids.  These are so yummy!  Nutella is truly the star of this cookie.  Getting a little pocket of chocolate-y goodness is like winning the lottery ;)  Enjoy!


Nutella Banana Cookies


1½ cups flour
1 cup sugar
½ tsp. baking soda
½ tsp. salt
¾ cup shortening
2 large mashed ripe bananas
1 egg
1¾ cup oats
¼ cup Nutella

Preheat oven to 400 degrees F


Sift flour, sugar, baking soda and salt together in a large bowl.

Beat in mashed ripe bananas and egg.  Cut in shortening.  Mix in oats.

Take a knife and "slice" nutella into batter with a knife. Don't mix it in completely, the stripes are what make them pretty!
Spoon "drops" onto a greased cookie sheet. 

Bake at 400 degrees F for about 8-10 minutes. (Note: this is a lot softer than normal cookie dough and will not form balls, hence spoon “drops”)

Recipe Source:  Chef In Training

Thursday, January 22, 2015

Banana Pudding Chewy Crinkle Cookies


I was scrolling through Instagram one day recently and saw that one of my friends had posted about a birthday of a family member.  She said her family member did not like cake, so they made him a cake out of his favorite cookies, these cookies.  I immediately went on a search for a recipe and came across these.  I am so glad I did!!  These cookies are so moist, and as an added bonus, you get small bits of vanilla wafer cookies right in the cookie!  

I had a friend come spend the night last week when her hubs was out of town.  I had to make a treat of course!  Perfect opportunity to test these babies out.  They were gobbled up by us and the kids in a hurry!  Enjoy :)


Banana Pudding Chewy Crinkle Cookies


2-1/4 cups unbleached, all-purpose flour
½ tsp. baking soda
1 tsp. baking powder
⅔ of 3.4 oz package of banana cream pudding mix
¼ tsp salt
¾ cup white granulated sugar
3 oz. cream cheese, room temperature, cut into small pieces
½ cup unsalted butter, melted and warm
1 large egg, room temperature
1 Tbsp. whole milk
About 8 vanilla wafer cookies, chopped (not crushed)
1 cup of powder sugar for rolling cookies

Preheat the oven to 350 and line the cookie sheet with parchment paper.

Place sugar and cream cheese in a large bowl.  Pour warm butter over sugar and cream cheese and whisk until all combined.  Add egg and milk, whisk until smooth.  Fold in chopped vanilla wafers.  Add flour, salt, baking soda, baking powder and banana cream mix. Mix with rubber spatula until completely combined. (You may have to just use your hands once dry ingredients are folded into wet ingredients, to finish mixing the cookie dough.)

Form 1-inch balls and roll them in powder sugar.  Place cookie balls on the baking sheet about 2 inches apart.  Bake for 11-12 minutes.


Recipe Source:  Will Cook For Smiles

Tuesday, January 13, 2015

Buckeye Brownie Cookies

Can I get a O-H?! Wahoo Buckeyes!!! What a game...I couldn't sleep last night, too excited!  My husband was actually AT the National Championship and I am SO SO bummed I did not go with him!  Instead, I was on my own couch screaming, jumping up and down, and yelling in my own family room by myself.  Oh well...they won is all that matters.  Oh how we miss Columbus and our Ohio family we made while there! #BuckeyeForLife

Anyhow, back to the recipe portion of the blog...for the game, I made these yummy Buckeye Brownie Cookies, and man oh man are they delicious!  Since the hubs was gone, I made up a plate of these cookies for a few of our neighbors and shared the Buckeye love so I wouldn't eat them all :)  We live in an area where we haven't met any other Buckeye fans, and we are in fact right across the border from Oregon, so Oregon fans abound!  No worries, I will convert them all ;)

Buckeye Brownie Cookies

1 box fudge brownie mix (19.5 ounce or family size)
¼ cup butter, melted
4 oz. (1/2 block) cream cheese, softened
1 egg
1 cup powdered sugar
1 cup creamy peanut butter
4 blocks (about 4 ounces) chocolate Candiquik

Heat oven to 350 degrees. In a medium bowl, beat the brownie mix, butter, cream cheese, and egg. The dough will be a little sticky. Scoop the dough onto an ungreased cookie sheet, making about 24 cookies. Smooth the edges of each to form a round cookie.

In a separate bowl, mix the powdered sugar and the peanut butter until it is completely combined. Form the mixture into about 1 inch balls. Make sure you have one ball for each cookie. Set aside.

Bake for the cookie dough 12 minutes, keeping an eye out to make sure the cookies doesn't over cook or undercook.

As soon as the cookies come out of the oven, press a peanut butter ball lightly into the center of each cookie. The peanut butter mixture will soften slightly, but that is OK. Let the cookies cool for 5 minutes, then transfer them to a wire rack to cool completely.

Melt the 4 blocks of chocolate in a microwavable bowl for 45 seconds. Stir the chocolate and melt for additional 15 seconds or until the chocolate is completely melted. (Candiquik comes in 16 ounce packages. When you open it, there are 16 blocks. Cut off 4 of these blocks for this recipe.) Spoon about ½ a tablespoon of melted chocolate on top of each cookie so it covers the peanut butter ball. Let the chocolate set. Store in an airtight container.


Recipe Source:  Tastes of Lizzy T

And just in case this wasn't enough Buckeye love for you, here are a few other Buckeye treats I have made and loved!

Pretzel Buckeye Bites


Buckeyes

Friday, December 5, 2014

Oreo Peppermint Crunch Cookies

 Today, I think I get the coolest wife award!  I made my husband not one, not two, but three treats to take into work for the staff to munch on while they were doing trainings today!  I am going to miss being home the two weeks prior to Christmas, so I guess I'm trying to get my love for holiday baking out of the way before we head out.  So stay tuned for the rest of those recipes :)  
 As I was mixing up the dough for these cookies, I thought there was no way they would turn out.  I was absolutely positive there were ten times for mix-ins than dough itself.  I mean we have peppermint crunch pieces, Oreos, and dark chocolate chips...and a lot of each!  I was happy to see that they actually baked up according to plan.  
They are delicious, super soft, and have a great mint flavor.  They are so perfect to take to neighbors or send out the door with your spouse when they have a meeting at work ;)  Or best yet, pour yourself a glass of milk and kick back to have one (or ten).

Oreo Peppermint Crunch Cookies

1 box white cake mix (15.25 oz.)(I use Pillsbury)
1 stick butter, melted (8 Tbsp.)
1 egg
1/2 teaspoon peppermint extract
1/2 teaspoon vanilla extract
4 ounces cream cheese, softened
1 cup Oreo cookie chunks
1 cup Andes Peppermint Crunch pieces
1/2 cup dark chocolate chips
Instructions

Combine the cake mix, melted butter, egg, and extracts. Beat until a soft dough forms. Add the cream cheese and beat in gently until combined. Stir in the peppermint crunch pieces and chocolate chips first. Then gently stir in the cookie pieces by hand being careful not to break up the cookie more. Refrigerate dough for at least 30 minutes.
Roll the dough into 36 balls. Bake on a cookie sheet at 350 degrees for 9 minutes. Do not over bake. The cookies will be very soft and look undone. Let them sit on the hot cookie sheet for 2 minutes, then gently remove them with a spatula to a piece of wax paper on the counter.
Very gently tap the tops of the cookies with the bottom of the spatula to even out the tops. Let them sit until completely cool. Store in a sealed container. Makes 36 cookies.

Recipe Source:  Inside Brew Crew Life